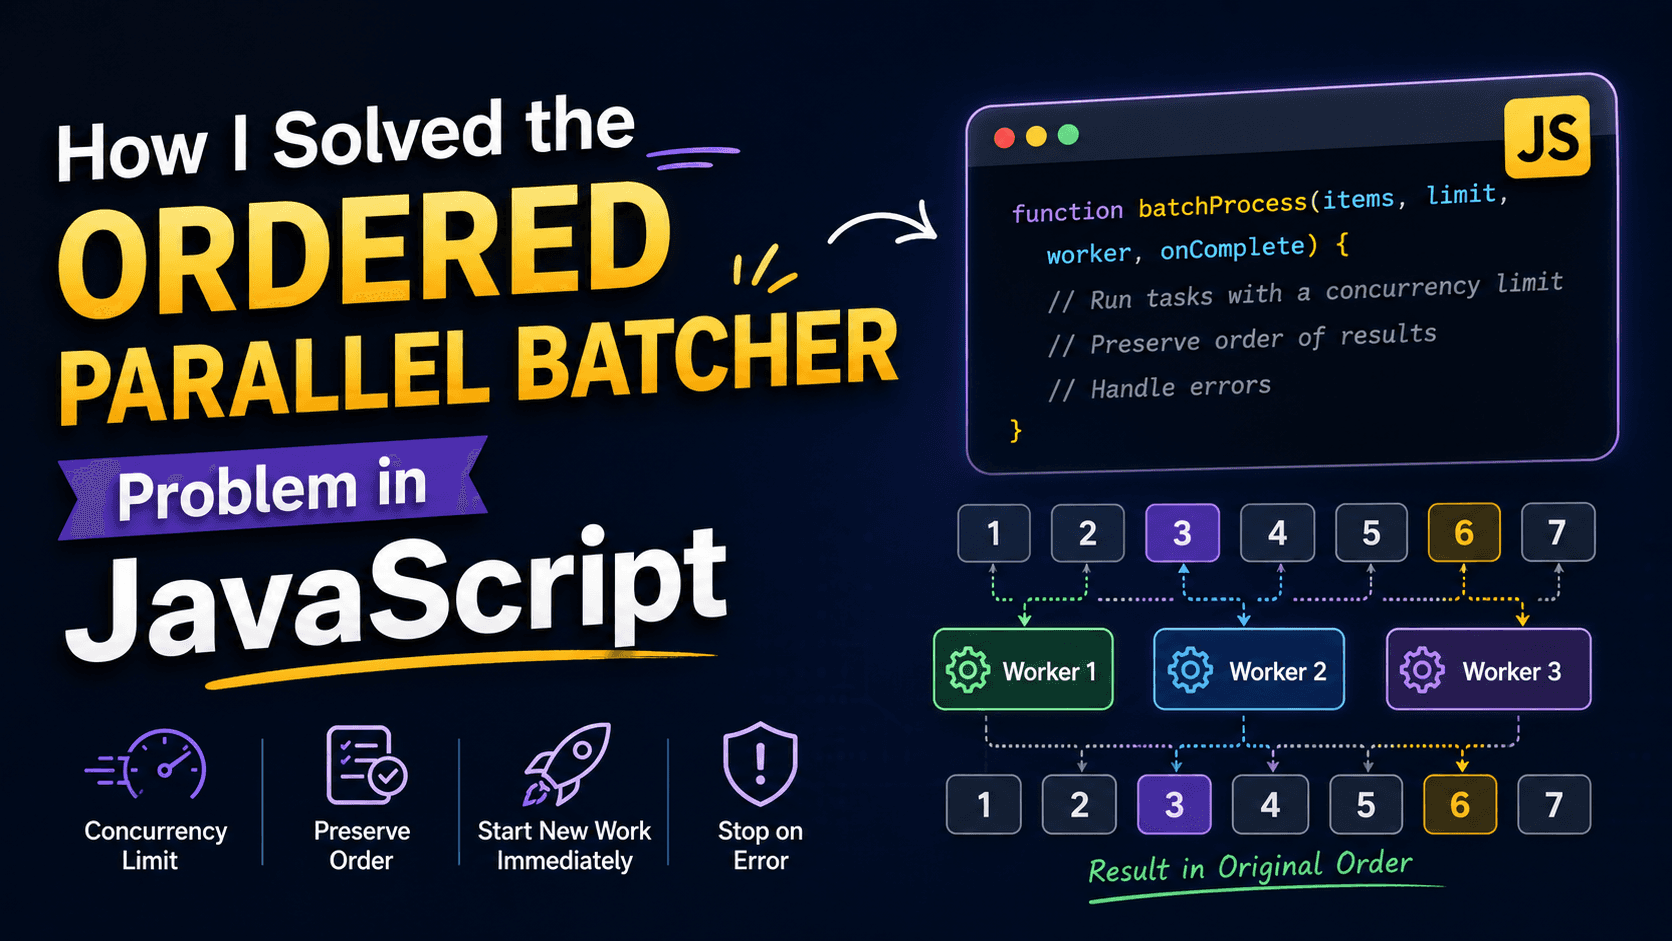
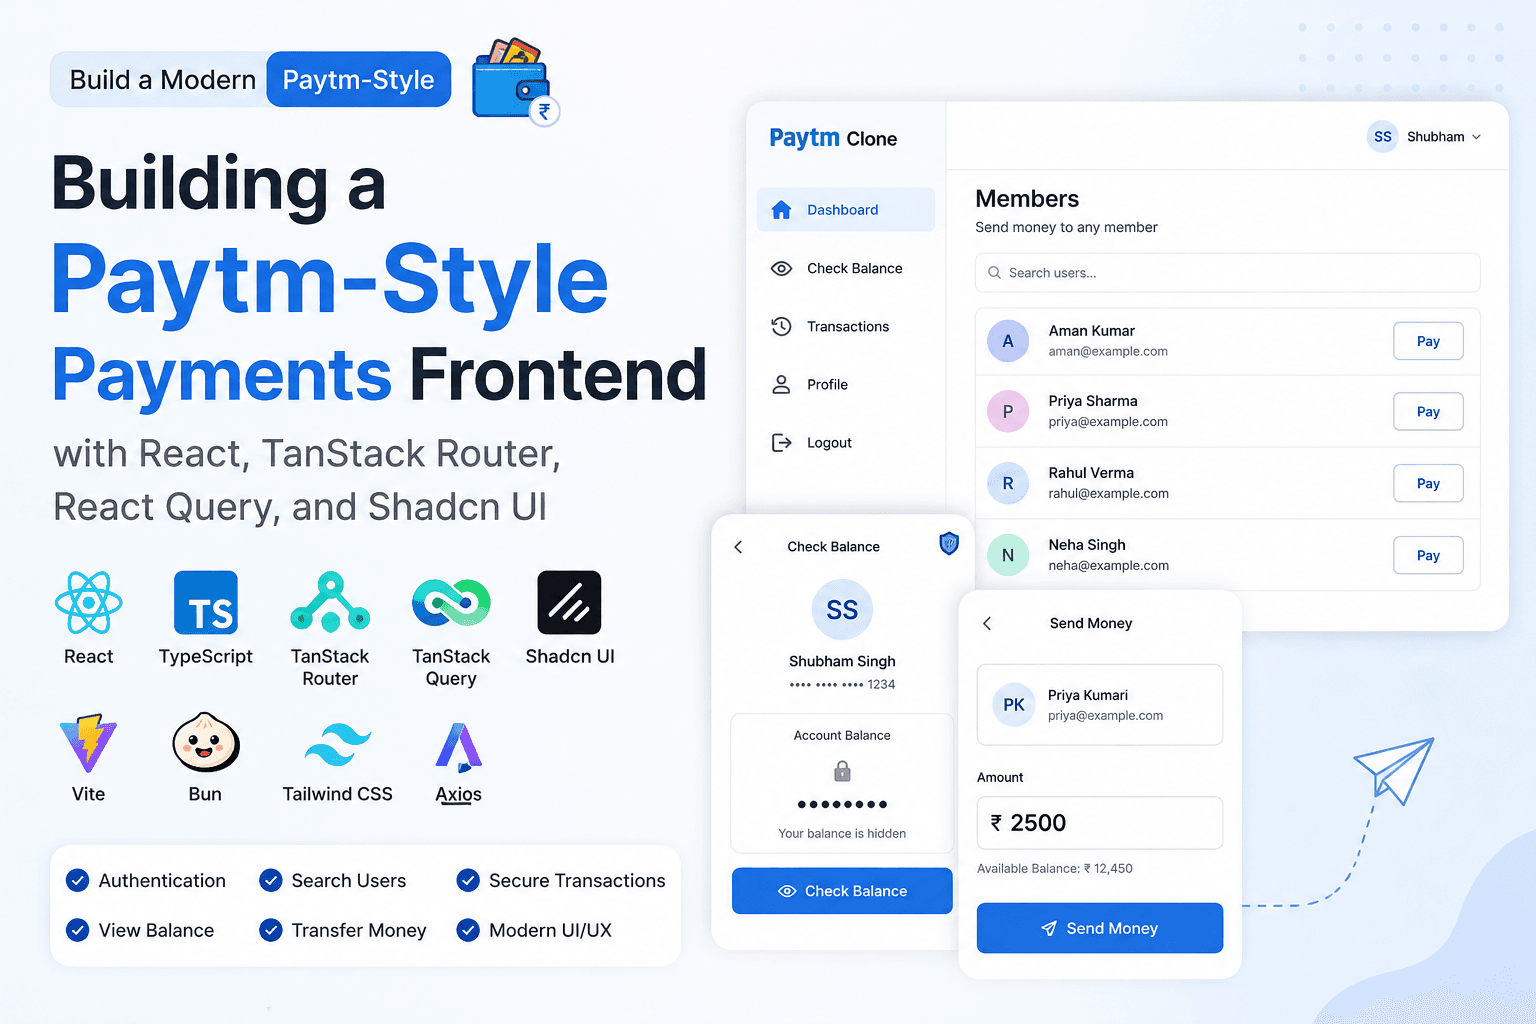
Building a Paytm-Style Payments Frontend with React, TanStack Router, React Query, and Shadcn UI
I'm Shubham (@shubhamsinghbundela), I'm a Software Engineer, a Full-stack developer, a tech enthusiast, and a technical writer here on @Hashnode. I have a strong zeal to share my acquired knowledge and I am also willing to learn from others.
Prerequisites
Before building the frontend application, I already created the backend for this project.
The backend is a Paytm-style payment system built with Bun, TypeScript, Express, MongoDB, JWT authentication, and MongoDB transactions.
If you'd like to understand how the backend works or build it yourself, you can read the complete backend tutorial here:
Backend Tutorial:
https://blog.realdev.club/building-a-paytm-style-payments-backend-with-bun-typescript-express-mongodb-transaction
What Are We Building?
A mini Paytm-style wallet application where users can:
Create an account
Login securely
View wallet balance
Search other users
Transfer money
Tech Stack
React
TypeScript
Vite
Bun
TanStack Router
TanStack Query
React Hook Form
Axios
Shadcn UI
Tailwind CSS
Step1: Project Setup
Create the Project
bun create vite
Select:
React
TypeScript
Install dependencies:
bun install
Run the development server:
bun run dev
Step2: Setting Up TanStack Router
For routing, I decided to use TanStack Router. One thing I really like about TanStack Router it supports file-based routing. Routes are generated from files inside the routes directory, making navigation more scalable as applications grow.
I followed the official TanStack Router manual installation guide:
TanStack Router Manual Installation Guide
After installation, let's understand a few core concepts.
Understanding TanStack Router Fundamentals
let's understand a few concepts that make it different from React Router.
- TanStack Router is File-Based
Instead of manually defining routes like:
<Route path="/dashboard" element={<Dashboard />} />
<Route path="/login" element={<Login />} />
you create route files:
routes/
├── login.tsx
├── dashboard.tsx
TanStack Router automatically generates the route configuration from your file structure.
This approach is very similar to the App Router introduced in Next.js.
As your application grows, file-based routing becomes much easier to manage than maintaining a large route configuration file.
2. __root.tsx is the Root Layout
Every TanStack Router application starts with a root route.
routes/
└── __root.tsx
All pages are rendered inside this route.
Think of it like:
function App() {
  return <Outlet />;
}
Outlet is the placeholder where child routes render.
Example:
function RootLayout() {
  return (
    <>
      <Navbar />
      <Outlet />
      <TanStackRouterDevtools />
    </>
  );
}
If a user visits:
/dashboard
TanStack Router renders:
<Navbar />
<Dashboard />
This makes it easy to share layouts, navigation, and global components across multiple pages.
3. WHat is
A small TanStack icon will appear in the browser during development. Clicking it opens the router inspector, making it easier to understand how routes are being resolved.
Since every page is rendered inside __root.tsx, placing the Devtools there makes them available throughout the entire application.
Step 3: Setting Up Shadcn UI
For building the UI, I decided to use Shadcn UI.
Unlike traditional component libraries such as Material UI or Chakra UI, Shadcn UI doesn't install a large component package into your project. Instead, it generates component source code directly inside your application, giving you complete control over customization.
I followed the official installation guide:
Quick Tailwind CSS Refresher
Since Shadcn UI relies heavily on Tailwind CSS, let's quickly revise some Tailwind fundamentals.
What is Tailwind CSS?
Tailwind CSS is a utility-first CSS framework.
Traditional frameworks such as Bootstrap provide pre-built components:
<button class="btn btn-primary">
  Save
</button>
Tailwind takes a different approach by providing small utility classes that can be combined to build custom designs:
<button class="bg-blue-500 text-white px-4 py-2 rounded">
  Save
</button>
This gives much more flexibility while keeping styling close to the component.
Common Utility Classes
Background & Text Colors
<div class="bg-blue-500 text-white">
Spacing
<div class="p-4 m-2">
| Class | Meaning |
|---|---|
| p-4 | padding |
| px-4 | horizontal padding |
| py-4 | vertical padding |
| m-4 | margin |
| mx-auto | center horizontally |
Width
w-1/2
width: 50%;
Typography
text-lg font-bold text-center
Equivalent CSS:
font-size: 18px;
font-weight: bold;
text-align: center;
Borders & Shadows
<div class="border rounded shadow-lg">
Flexbox
<div class="flex items-center justify-between">
Grid
<div class="grid grid-cols-3 gap-4">
Responsive Design
One of Tailwind's strongest features is responsive utilities.
<div class="text-sm md:text-lg lg:text-2xl">
Screen sizes:
sm:Small screensmd:Tabletslg:Laptopsxl:Desktops2xl:Large displays
Container
<div class="container mx-auto px-4">
containercreates a responsive containermx-autocenters it horizontallypx-4adds horizontal padding
Customizing Tailwind
Tailwind provides default:
Colors
Fonts
Spacing
Breakpoints
These can be customized inside your configuration.
Example:
theme: {
  colors: {
    primary: "#3490dc",
  },
}
Usage:
<div class="bg-primary">
Reusing Styles with @apply
Instead of repeating utilities:
bg-blue-500 text-white px-4 py-2 rounded
You can create reusable classes:
.btn {
  @apply bg-blue-500 text-white px-4 py-2 rounded;
}
Then use:
<button class="btn">
  Save
</button>
Tailwind's utility-first approach may feel unusual at first, but after building a few components, it becomes one of the fastest ways to create responsive and maintainable user interfaces.
Step4: Creating Login and Signup Pages
Instead of building forms from scratch, I used the pre-built authentication blocks provided by Shadcn UI.
bunx --bun shadcn@latest add login-01
bunx --bun shadcn@latest add signup-01
These commands generated ready-to-use login and signup components that I customized for my application.
Login Route
src/routes/index.tsx
import { createFileRoute } from "@tanstack/react-router";
import { LoginForm } from "@/components/login-form";

export const Route = createFileRoute("/")({
  component: LoginPage,
});

function LoginPage() {
  return (
    <div className="flex min-h-screen items-center justify-center">
      <div className="w-full max-w-md">
        <LoginForm />
      </div>
    </div>
  );
}
Signup Route
src/routes/signup.tsx
import { createFileRoute } from "@tanstack/react-router";
import { SignupForm } from "@/components/signup-form";

export const Route = createFileRoute("/signup")({
  component: SignupPage,
});

function SignupPage() {
  return (
    <div className="flex min-h-screen items-center justify-center">
      <div className="w-full max-w-md">
        <SignupForm />
      </div>
    </div>
  );
}
Connecting Pages with TanStack Router Links
To navigate between Login and Signup pages without reloading the browser, I used TanStack Router's Link component.
Inside Signup Form
src/components/signup-form.tsx
Import Link:
import { Link } from "@tanstack/react-router";
Replace:
<FieldDescription className="px-6 text-center">
  Already have an account? <a href="#">Sign in</a>
</FieldDescription>
with:
<FieldDescription className="px-6 text-center">
  Already have an account?{" "}
  <Link to="/">Sign in</Link>
</FieldDescription>
Inside Login Form
src/components/login-form.tsx
Replace:
<FieldDescription className="text-center">
Don't have an account?
<a href="#">Signup</a>
</FieldDescription>
with:
<FieldDescription className="text-center">
Don't have an account?
<Link to="/signup">Signup</Link>
</FieldDescription>
Form Handling with React Hook Form
For form state management and validation, I used React Hook Form.
Install it:
bun add react-hook-form
Import useForm:
import { useForm } from "react-hook-form";
Initialize the form:
const {
  register,
  handleSubmit,
  formState: { errors },
} = useForm<LoginFormData>();
Create a submit handler:
const onSubmit = (data: SignupFormData) => {
  console.log(data);

  // signup mutation here
};
Update the form:
<form onSubmit={handleSubmit(onSubmit)}>
Connect the inputs:
<Input
  id="first-name"
  type="text"
  placeholder="John"
  {...register("firstName", {
    required: "First name is required",
  })}
/>
<Input
  id="last-name"
  type="text"
  placeholder="Doe"
  {...register("lastName", {
    required: "Last name is required",
  })}
/>
<Input
  id="email"
  type="email"
  placeholder="m@example.com"
  {...register("email", {
    required: "Email is required",
    pattern: {
      value: /^\S+@\S+$/i,
      message: "Invalid email address",
    },
  })}
/>
<Input
  id="password"
  type="password"
  {...register("password", {
    required: "Password is required",
    minLength: {
      value: 8,
      message: "Password must be at least 8 characters",
    },
  })}
/>
Show validation errors using your existing FieldError component:
import { FieldError } from "@/components/ui/field";
Example:
<Field>
  <FieldLabel htmlFor="first-name">First Name</FieldLabel>

  <Input
    id="first-name"
    type="text"
    placeholder="John"
    {...register("firstName", {
      required: "First name is required",
    })}
  />

  <FieldError errors={[errors.firstName]} />
</Field>
For email:
<FieldError errors={[errors.email]} />
For password:
<FieldError errors={[errors.password]} />
This gives you:
Form state management
Validation
Error messages
No re-renders on every keystroke
Easy integration later with React Query mutations:
Here's your LoginForm connected to React Hook Form in the same style as the signup form.
import { cn } from "@/lib/utils";
import { Button } from "@/components/ui/button";
import { Link } from "@tanstack/react-router";
import {
Card,
CardContent,
CardDescription,
CardHeader,
CardTitle,
} from "@/components/ui/card";
import {
Field,
FieldDescription,
FieldError,
FieldGroup,
FieldLabel,
} from "@/components/ui/field";
import { Input } from "@/components/ui/input";
import { useForm } from "react-hook-form";
type LoginFormData = {
email: string;
password: string;
};
export function LoginForm({
className,
...props
}: React.ComponentProps<"div">) {
const {
register,
handleSubmit,
formState: { errors },
} = useForm<LoginFormData>();
const onSubmit = (data: LoginFormData) => {
console.log(data);
// loginMutation.mutate(data)
};
return (
<div className={cn("flex flex-col gap-6", className)} {...props}>
<Card>
<CardHeader>
<CardTitle>Login to your account</CardTitle>
<CardDescription>
Enter your email below to login to your account
</CardDescription>
</CardHeader>
<CardContent>
<form onSubmit={handleSubmit(onSubmit)}>
<FieldGroup>
<Field>
<FieldLabel htmlFor="email">Email</FieldLabel>
<Input
id="email"
type="email"
placeholder="m@example.com"
{...register("email", {
required: "Email is required",
pattern: {
value: /^\S+@\S+\.\S+$/,
message: "Please enter a valid email",
},
})}
/>
<FieldError errors={[errors.email]} />
</Field>
<Field>
<div className="flex items-center">
<FieldLabel htmlFor="password">Password</FieldLabel>
<a
href="#"
className="ml-auto inline-block text-sm underline-offset-4 hover:underline"
>
Forgot your password?
</a>
</div>
<Input
id="password"
type="password"
{...register("password", {
required: "Password is required",
})}
/>
<FieldError errors={[errors.password]} />
</Field>
<Field>
<Button type="submit">Login</Button>
<Button variant="outline" type="button">
Login with Google
</Button>
<FieldDescription className="text-center">
Don't have an account?{" "}
<Link to="/signup">Sign up</Link>
</FieldDescription>
</Field>
</FieldGroup>
</form>
</CardContent>
</Card>
</div>
);
}
Step 5: Setting Up Axios and TanStack Query
For API communication, I used Axios along with TanStack Query.
A common misconception is that React Query replaces Axios. It doesn't.
Both solve different problems:
| Tool | Responsibility |
|---|---|
| Axios | Making HTTP requests |
| TanStack Query | Managing server state, caching, loading states, retries, mutations, and refetching |
The flow looks like this:
Component
    ↓
TanStack Query
(useQuery / useMutation)
    ↓
API Function
    ↓
Axios Instance
    ↓
Backend API
Creating the Axios Instance
First, create a reusable Axios instance.
src/api/axios.ts
import axios from "axios";

const api = axios.create({
  baseURL: import.meta.env.VITE_API_URL,
  withCredentials: true,
  timeout: 10000,
});

export default api;
Why These Options?
baseURLprevents repeating the API URL in every request.withCredentialsallows cookies to be sent with requests (useful for refresh tokens).timeoutautomatically aborts requests that take too long.
Token Utilities
I stored the access token in localStorage.
src/utils/token.ts
export const getAccessToken = () =>
  localStorage.getItem("accessToken");

export const setAccessToken = (token: string) =>
  localStorage.setItem(
    "accessToken",
    token
  );

export const clearTokens = () => {
  localStorage.removeItem("accessToken");
};
Refresh Token API
When an access token expires, we'll request a new one using the refresh token.
src/api/auth.api.ts
import axios from "axios";

export const refreshToken = async () => {
  return axios.post(
    `${import.meta.env.VITE_API_URL}/v1/user/refresh`,
    {},
    {
      withCredentials: true,
    }
  );
};
Axios Interceptors
One of the best features of Axios is interceptors.
Interceptors allow us to:
Attach tokens automatically.
Refresh expired access tokens.
Retry failed requests.
Centralize authentication logic.
Request Interceptor
Before every request, attach the access token.
api.interceptors.request.use((config) => {
  const token = getAccessToken();

  if (token) {
    config.headers.Authorization = `Bearer ${token}`;
  }

  return config;
});
Now every authenticated request automatically includes:
Authorization: Bearer your_access_token
without manually adding headers everywhere.
Response Interceptor
When the backend returns:
401 Unauthorized
the interceptor attempts to refresh the token and retries the original request.
api.interceptors.response.use(
  (response) => response,

  async (error) => {
    const originalRequest = error.config;

    if (error.response?.status === 401 && !originalRequest._retry) {
      originalRequest._retry = true;

      try {
        const res = await refreshToken();

        const newAccessToken = res.data.data.accessToken;

        setAccessToken(newAccessToken);

        api.defaults.headers.common.Authorization = `Bearer ${newAccessToken}`;

        originalRequest.headers.Authorization = `Bearer ${newAccessToken}`;

        return api(originalRequest);
      } catch (error) {
        clearTokens();

        return Promise.reject(error);
      }
    }
    return Promise.reject(error);
  },
);
Authentication Flow
Request
    ↓
Access Token Added
    ↓
Backend
    ↓
401 ?
    ↓
Yes
    ↓
Refresh Token API
    ↓
New Access Token
    ↓
Retry Original Request
This creates a seamless authentication experience because users remain logged in even when access tokens expire.
Installing TanStack Query
bun add @tanstack/react-query
Creating the Query Client
Create a centralized Query Client.
src/lib/react-query.ts
import { QueryClient } from "@tanstack/react-query";

export const queryClient =
  new QueryClient({
    defaultOptions: {
      queries: {
        retry: 1,
        staleTime: 1000 * 60 * 5,
      },
    },
  });
What Do These Options Mean?
retry: 1
If a query fails, React Query retries it once before marking it as failed.
staleTime: 1000 * 60 * 5
Query data remains fresh for 5 minutes.
During that period, React Query serves data from cache instead of immediately making another API request.
Providing React Query to the Application
Wrap the application using QueryClientProvider.
src/main.tsx
import ReactDOM from "react-dom/client";
import {
  QueryClientProvider,
} from "@tanstack/react-query";

import { queryClient } from "@/lib/react-query";

import "./api/axiosInterceptor";

ReactDOM.createRoot(
  document.getElementById("root")!
).render(
  <QueryClientProvider
    client={queryClient}
  >
    <App />
  </QueryClientProvider>
);
Notice that the Axios interceptor is imported once during application startup.
This ensures every API request automatically benefits from token handling and refresh logic.
At this point we have:
✅ Axios configured
✅ Automatic token injection
✅ Automatic token refresh
✅ Global React Query setup
✅ Query caching and retry support
In the next section, we'll create authentication APIs and connect our Login and Signup forms using React Query mutations.
Understanding React Query Concepts
At first, React Query may seem like just two hooks:
useQuery()
useMutation()
But it provides many powerful features that make server-state management much easier.
1. Query Keys
React Query identifies cached data using query keys.
useQuery({
  queryKey: ["users"],
  queryFn: getUsers,
});

useQuery({
  queryKey: ["user", userId],
  queryFn: () => getUser(userId),
});
This creates separate cache entries:
["users"]
["user", 1]
["user", 2]
Each user is cached independently.
2. Mutations
Mutations are used when modifying data on the server.
Common use cases:
Create (POST)
Update (PUT/PATCH)
Delete (DELETE)
const createUserMutation = useMutation({
  mutationFn: createUser,
});
3. Loading and Error States
React Query automatically provides request status.
Queries
const {
  data,
  isLoading,
  isError,
} = useQuery(...);
Mutations
const mutation = useMutation(...);

mutation.isPending;
mutation.isSuccess;
mutation.isError;
Example:
<Button disabled={mutation.isPending}>
  {mutation.isPending
    ? "Creating..."
    : "Create Account"}
</Button>
4. Query Invalidation
After creating or updating data, you often need fresh data.
queryClient.invalidateQueries({
  queryKey: ["users"],
});
This marks the query as stale and triggers a refetch.
5. Conditional Queries
Sometimes a query should only run when a condition is true.
useQuery({
  queryKey: ["profile"],
  queryFn: getProfile,
  enabled: isLoggedIn,
});
The query executes only when:
isLoggedIn === true
6. Dependent Queries
A query can depend on the result of another query.
const { data: user } = useQuery({
  queryKey: ["user"],
  queryFn: getCurrentUser,
});

const { data: transactions } = useQuery({
  queryKey: ["transactions", user?.id],
  queryFn: () => getTransactions(user!.id),
  enabled: !!user,
});
The second query waits until the user data is available.
7. Manual Cache Updates
Instead of refetching data, you can update the cache directly.
queryClient.setQueryData(
  ["todos"],
  (old) => [...old, newTodo]
);
This makes the UI update instantly.
8. Optimistic Updates
Optimistic updates show changes in the UI before the server responds.
const mutation = useMutation({
  mutationFn: createTodo,

  onMutate: async (newTodo) => {
    queryClient.setQueryData(
      ["todos"],
      (old) => [...old, newTodo]
    );
  },
});
The user sees the new item immediately, creating a faster experience.
9. Prefetching Data
React Query allows loading data before a page renders.
await queryClient.prefetchQuery({
  queryKey: ["users"],
  queryFn: getUsers,
});
This works especially well with TanStack Router loaders.
Organizing Authentication Logic
As the application started growing, I didn't want API calls and React Query logic mixed directly inside components. To keep things clean and scalable, I created a feature-based structure for authentication.
Folder Structure
src
│
├── features
│   └── auth
│       ├── api
│       │   └── auth.api.ts
│       │
│       └── hooks
│           ├── useSignupMutation.ts
│           └── useLoginMutation.ts
This keeps all authentication-related code in a single place.
Creating Authentication APIs
Inside:
src/features/auth/api/auth.api.ts
I created all authentication API functions.
Signup API
import api from "@/api/axios";

export type SignupPayload = {
  firstName: string;
  lastName: string;
  email: string;
  password: string;
};

export const signupUser = async (
  data: SignupPayload
) => {
  const response = await api.post(
    "/v1/user/signup",
    data
  );

  return response.data;
};
Login API
export type LoginPayload = {
  email: string;
  password: string;
};

export type LoginResponse = {
  success: boolean;
  message: string;
  data: {
    accessToken: string;
    user: {
      id: string;
      firstName: string;
      lastName: string;
      email: string;
    };
  };
};

export const loginUser = async (
  data: LoginPayload
): Promise<LoginResponse> => {
  const response = await api.post<LoginResponse>(
    "/v1/user/signin",
    data
  );

  return response.data;
};
Creating React Query Mutation Hooks
Instead of calling APIs directly inside components, I wrapped them inside custom hooks.
Signup Mutation
src/features/auth/hooks/useSignupMutation.ts
import { useMutation } from "@tanstack/react-query";

import {
  signupUser,
  type SignupPayload,
} from "../api/auth.api";

export const useSignupMutation = () => {
  return useMutation({
    mutationFn: (data: SignupPayload) =>
      signupUser(data),
  });
};
Login Mutation
src/features/auth/hooks/useLoginMutation.ts
import { useMutation } from "@tanstack/react-query";
import { loginUser } from "../api/auth.api";

export const useLoginMutation = () => {
  return useMutation({
    mutationFn: loginUser,
  });
};
This gives us access to:
mutation.mutate()
mutation.isPending
mutation.isSuccess
mutation.isError
Connecting Signup Form
Inside the Signup form component, I used the custom signup mutation hook.
const navigate = useNavigate();

const signupMutation =
  useSignupMutation();

const onSubmit = (
  data: SignupFormData
) => {
  signupMutation.mutate(data, {
    onSuccess: () => {
      navigate({
        to: "/",
      });
    },
  });
};
Flow:
Submit Form
      ↓
signupMutation.mutate()
      ↓
POST /signup
      ↓
Success
      ↓
Redirect to Login Page
Connecting Login Form
For login, I wanted to:
Authenticate the user
Store the access token
Store user information in React Query cache
Redirect to Dashboard
const navigate = useNavigate();

const loginMutation =
  useLoginMutation();

const onSubmit = (
  data: LoginFormData
) => {
  loginMutation.mutate(data, {
    onSuccess: (response) => {
      const {
        accessToken,
        user,
      } = response.data;

      setAccessToken(accessToken);

      navigate({
        to: "/dashboard",
      });
    },

    onError: (error) => {
      console.error(error);
    },
  });
};
At this point we have:
✅ Signup Page
✅ Login Page
✅ Form Validation with React Hook Form
✅ API Layer with Axios
✅ Automatic Token Refresh using Axios Interceptors
✅ React Query Mutations
In the next section, we'll build protected routes.
Step 6: Protecting Routes with TanStack Router
Now that authentication is working, we need to prevent unauthorized users from accessing protected pages such as the Dashboard.
TanStack Router provides an excellent authentication pattern through route context and beforeLoad(). I followed the approach recommended in the official documentation:
TanStack Router Authentication Guide
The goal is simple:
Unauthenticated users should only access Login and Signup pages.
Authenticated users should access protected pages such as Dashboard.
Logged-in users should not be able to visit the Login page again.
To achieve this, we'll create a central authentication context and make it available to every route.
Creating an Authentication Context
Instead of checking authentication inside every page, I created a single Auth Context.
src/auth.tsx
import React, { createContext, useContext } from "react";
import { useQuery } from "@tanstack/react-query";
import { getMe } from "@/features/auth/api/auth.api";
import { Spinner } from "@/components/ui/spinner";

export interface User {
  id: string;
  firstName: string;
  lastName: string;
  email: string;
}

interface AuthState {
  user: User | null;
  isAuthenticated: boolean;
  isLoading: boolean;
}

const AuthContext = createContext<AuthState | undefined>(undefined);

export function AuthProvider({ children }: { children: React.ReactNode }) {
  const {
    data: user,
    isLoading,
    isError,
  } = useQuery({
    queryKey: ["me"],
    queryFn: getMe,
    retry: false,
  });

  const isAuthenticated = !!user && !isError;

  if (isLoading) {
    return (
      <div className="flex items-center justify-center min-h-screen">
        <Spinner />
      </div>
    );
  }

  return (
    <AuthContext.Provider
      value={{
        user: user ?? null,
        isAuthenticated,
        isLoading,
      }}
    >
      {children}
    </AuthContext.Provider>
  );
}

export function useAuth() {
  const context = useContext(AuthContext);

  if (!context) {
    throw new Error("useAuth must be used within an AuthProvider");
  }

  return context;
}
The responsibility of this provider is simple:
Fetch the current user using
getMe()Determine whether the user is authenticated
Make authentication state available throughout the application
Passing Authentication to TanStack Router
Next, we need TanStack Router to access this authentication state.
Configure Router Context
Update src/routes/__root.tsx
import { createRootRouteWithContext, Outlet } from "@tanstack/react-router";
import { TanStackRouterDevtools } from "@tanstack/react-router-devtools";
import type { User } from "@/auth";

interface RouterAuth {
  user: User | null;
  isAuthenticated: boolean;
  isLoading: boolean;
}

interface RouterContext {
  auth: RouterAuth;
}

export const Route = createRootRouteWithContext<RouterContext>()({
  component: () => (
    <>
      <Outlet />
      <TanStackRouterDevtools />
    </>
  ),
});
Now every route understands that router context contains:
context.auth
Configure the Router
src/router.ts
import { createRouter } from "@tanstack/react-router";
import { routeTree } from "./routeTree.gen";

export const router = createRouter({
  routeTree,
  context: {
    auth: undefined!,
  },
});

declare module "@tanstack/react-router" {
  interface Register {
    router: typeof router;
  }
}
Notice that we are only defining the shape of the context here.
The actual value will be provided later.
Connect AuthProvider and Router
src/App.tsx
import { RouterProvider } from "@tanstack/react-router";
import { AuthProvider, useAuth } from "./auth";
import { router } from "./router";

function InnerApp() {
  const auth = useAuth();

  return (
    <RouterProvider
      router={router}
      context={{
        auth,
      }}
    />
  );
}

export default function App() {
  return (
    <AuthProvider>
      <InnerApp />
    </AuthProvider>
  );
}
Creating Protected Routes
Instead of protecting every route individually, I created a protected layout route.
routes
│
├── _authenticated.tsx
│
└── _authenticated
    └── dashboard.tsx
Everything inside _authenticated automatically becomes protected.
Protected Layout Route
src/routes/_authenticated.tsx
import { createFileRoute, redirect, Outlet } from "@tanstack/react-router";

export const Route = createFileRoute("/_authenticated")({
  beforeLoad: ({ context }) => {
    if (!context.auth.isAuthenticated) {
      throw redirect({
        to: "/",
      });
    }
  },

  component: () => <Outlet />,
});
Before any child route renders, TanStack Router executes:
beforeLoad()
      ↓
Authenticated?
      ↓
Yes → Continue
No  → Redirect("/")
Why Do We Need Another Outlet?
We already have an Outlet inside __root.tsx, so why do we need another one?
The route hierarchy looks like:
__root.tsx
    ↓
Outlet
    ↓
_authenticated.tsx
    ↓
Outlet
    ↓
dashboard.tsx
Every layout route needs its own Outlet to render child routes.
Without the second outlet:
__root
   ↓
_authenticated
the dashboard would never render.
Dashboard Route
src/routes/_authenticated/dashboard.tsx
import { createFileRoute } from "@tanstack/react-router";

export const Route = createFileRoute("/_authenticated/dashboard")({
  component: Dashboard,
});

function Dashboard() {
  const { auth } = Route.useRouteContext();

  return (
    <div className="p-6">
      <h1 className="text-2xl font-bold">Dashboard</h1>

      <p>
        Welcome {auth.user?.firstName} {auth.user?.lastName}
      </p>

      <p>{auth.user?.email}</p>
    </div>
  );
}
Because authentication is stored inside router context, the dashboard can directly access:
auth.user
without making another API request.
Redirecting Logged-In Users Away From Login
We also don't want authenticated users visiting the login page.
src/routes/index.tsx
export const Route = createFileRoute("/")({
  beforeLoad: ({ context }) => {
    if (context.auth.isAuthenticated) {
      throw redirect({
        to: "/dashboard",
      });
    }
  },

  component: LoginPage,
});
Flow:
User Visits "/"
        ↓
Already Logged In?
        ↓
Yes
        ↓
Redirect "/dashboard"
Notice that we're checking:
context.auth.isAuthenticated
instead of:
context.auth.user
This keeps route logic independent of how authentication is implemented internally.
The Complete Authentication Lifecycle
Let's walk through what happens when the application starts.
Step 1: App renders
export default function App() {
  return (
    <AuthProvider>
      <InnerApp />
    </AuthProvider>
  );
}
At this moment:
AuthProvider mounts
↓
useQuery(["me"]) runs
↓
getMe() API is called
Step 2: AuthProvider executes
const {
  data: user,
  isLoading,
  isError,
} = useQuery({
  queryKey: ["me"],
  queryFn: getMe,
  retry: false,
});
Initially:
user = undefined
isLoading = true
isError = false
because the API request is still in progress.
Step 3: Loading screen
Because:
if (isLoading) {
  return <Loading />;
}
React renders:
Loading...
and InnerApp does not render yet.
This is important.
At this point:
RouterProvider is NOT mounted
Routes are NOT running
beforeLoad is NOT running
Step 4: getMe finishes
Suppose the backend returns:
{
  "data": {
    "user": {
      "id": "1",
      "firstName": "Shubham",
      "lastName": "Singh",
      "email": "test@test.com"
    }
  }
}
Then:
user = {
  id: "1",
  firstName: "Shubham",
  ...
}

isLoading = false
isError = false
Step 5: isAuthenticated
You calculate:
const isAuthenticated = !!user && !isError;
Since:
!!user === true
!isError === true
Result:
isAuthenticated = true
Step 6: Context is created
<AuthContext.Provider
  value={{
    user,
    isAuthenticated,
    isLoading,
  }}
>
Now the context contains:
{
  user: {...},
  isAuthenticated: true,
  isLoading: false
}
Step 7: InnerApp renders
function InnerApp() {
  const auth = useAuth();

  return (
    <RouterProvider
      router={router}
      context={{
        auth,
      }}
    />
  );
}
useAuth() returns:
{
  user: {...},
  isAuthenticated: true,
  isLoading: false
}
Then:
context={{
  auth,
}}
passes it into TanStack Router.
Step 8: Router Context Becomes Available Everywhere
Because the router receives the authentication state through context:
<RouterProvider
  context={{
    auth,
  }}
/>
every route now has access to:
context.auth
inside:
beforeLoadloaderRoute components
This is the bridge between React Context and TanStack Router.
Step 9: Public Route Protection
Consider the login page:
export const Route = createFileRoute("/")({
  beforeLoad: ({ context }) => {
    if (context.auth.isAuthenticated) {
      throw redirect({
        to: "/dashboard",
      });
    }
  },
});
Current value:
context.auth = {
  user: {...},
  isAuthenticated: true,
  isLoading: false
}
Since:
context.auth.isAuthenticated === true
TanStack Router immediately redirects:
/
 ↓
Already authenticated
 ↓
/dashboard
This prevents logged-in users from seeing the login page again.
Step 10: Protected Route Check
Now suppose the user visits:
/dashboard
This route actually matches:
/_authenticated/dashboard
Before the dashboard renders, TanStack Router first executes the parent route:
/_authenticated
which contains:
beforeLoad: ({ context }) => {
  if (!context.auth.isAuthenticated) {
    throw redirect({
      to: "/",
    });
  }
}
Current value:
context.auth.isAuthenticated === true
Therefore:
!true
becomes:
false
No redirect occurs and the dashboard is rendered.
Complete Authentication Flow
                  Application Starts
                          ↓
                  AuthProvider Mounts
                          ↓
                    useQuery(["me"])
                          ↓
                        getMe()
                          ↓
                     User Returned?
                          ↓
 ┌───────────────┴───────────────┐
 │                                                 │
Yes                                                No
 │                                                 │
Authenticated                                Unauthenticated
 │                                                 │
isAuthenticated=true                      isAuthenticated=false
 │                                                 │
AuthContext                                    AuthContext
 │                                                 │
RouterProvider                                RouterProvider
 │                                                 │
context.auth                                   context.auth
 │                                                 │
beforeLoad()                                   beforeLoad()
 │                                                 │
Dashboard                                      Redirect("/")
Updating the Login Flow
const onSubmit = (data: LoginFormData) => {
  loginMutation.mutate(data, {
    onSuccess: (response) => {
      const {
        accessToken,
        user,
      } = response.data;

      setAccessToken(accessToken);

      navigate({
        to: "/dashboard",
      });
    },
  });
};
is no longer enough after implementing route protection with AuthProvider.
The reason is that AuthProvider relies on:
useQuery({
  queryKey: ["me"],
  queryFn: getMe,
})
to determine authentication status.
After login succeeds, React Query still has the old cached result for ["me"].
So even though the access token is stored, the authentication state may not update immediately.
Updated Login Handler
const onSubmit = (data: LoginFormData) => {
  loginMutation.mutate(data, {
    onSuccess: async (res) => {
      setAccessToken(res.data.accessToken);

      await queryClient.invalidateQueries({
        queryKey: ["me"],
      });

      navigate({
        to: "/dashboard",
        replace: true,
      });
    },
  });
};
What Does invalidateQueries Do?
await queryClient.invalidateQueries({
  queryKey: ["me"],
});
This tells React Query:
The cached user information is now stale.
Please fetch it again.
React Query then executes:
getMe()
again.
The new request now includes the fresh access token through our Axios interceptor.
Login Success
      ↓
Access Token Stored
      ↓
invalidateQueries(["me"])
      ↓
getMe()
      ↓
User Returned
      ↓
AuthProvider Updates
      ↓
isAuthenticated = true
      ↓
Navigate("/dashboard")
Final Login Flow
User Submits Login Form
        ↓
POST /signin
        ↓
Access Token Received
        ↓
Store Access Token
        ↓
invalidateQueries(["me"])
        ↓
getMe()
        ↓
AuthProvider Updates
        ↓
isAuthenticated = true
        ↓
Navigate("/dashboard")
        ↓
Protected Route Passes
        ↓
Dashboard Renders

Step7: Building a Dashboard Layout with Shadcn Sidebar and Tanstack Router
After implementing authentication and protected routes, the next step was creating a dashboard layout that could be shared across all authenticated pages.
Since the application will eventually contain multiple pages such as Dashboard, Check Balance, Transfer Money, and Transactions, I wanted a reusable layout with a sidebar instead of duplicating navigation on every page.
Installing the Sidebar Component
I started by exploring the Shadcn UI sidebar documentation:
Then installed the sidebar block:
bunx --bun shadcn@latest add sidebar
This generated the core sidebar components and supporting utilities.
Using a Layout Route
One of the biggest advantages of TanStack Router is route layouts.
Instead of placing the sidebar inside every page component, I created a layout route using _authenticated.tsx.
import { createFileRoute, Outlet, redirect } from "@tanstack/react-router";
import { SidebarProvider, SidebarTrigger } from "@/components/ui/sidebar";
import { AppSidebar } from "@/components/app-sidebar";

export const Route = createFileRoute("/_authenticated")({
  beforeLoad: ({ context }) => {
    if (!context.auth.isAuthenticated) {
      throw redirect({
        to: "/",
      });
    }
  },
  component: AuthenticatedLayout,
});

function AuthenticatedLayout() {
  return (
    <SidebarProvider>
      <AppSidebar />

      <main className="flex-1">
        <SidebarTrigger />

        <Outlet />
      </main>
    </SidebarProvider>
  );
}
The important part here is the second Outlet.
Our route hierarchy now looks like:
__root.tsx
    ↓
_authenticated.tsx
    ↓
Dashboard
CheckBalance
Whenever a child route renders, it appears inside the layout's Outlet.
This means the sidebar is rendered once and shared across all authenticated pages.
Creating Dashboard Pages
Next, I created dedicated route files for each page.
routes
│
├── _authenticated.tsx
│
└── _authenticated
    ├── Dashboard.tsx
    └── CheckBalance.tsx
Dashboard Route:
import { createFileRoute } from "@tanstack/react-router";

export const Route = createFileRoute("/_authenticated/Dashboard")({
  component: DashboardPage,
});

function DashboardPage() {
  return <div>Dashboard Page</div>;
}
Check Balance Route:
import { createFileRoute } from "@tanstack/react-router";

export const Route = createFileRoute("/_authenticated/CheckBalance")({
  component: CheckBalancePage,
});

function CheckBalancePage() {
  return <div>Check Balance Page</div>;
}
TanStack Router automatically generates route definitions from these files.
Creating the Sidebar Component
Next, I created an AppSidebar component responsible for rendering navigation links and user information.
src/components/app-sidebar
import {
  Sidebar,
  SidebarContent,
  SidebarFooter,
  SidebarHeader,
  SidebarMenu,
  SidebarMenuButton,
  SidebarMenuItem,
} from "@/components/ui/sidebar";

import { NavUser } from "@/components/nav-user";
import { IconChartBar, IconDashboard } from "@tabler/icons-react";
import { NavMain } from "@/components/nav-main";

export function AppSidebar() {
  const data = {
    user: {
      name: "shadcn",
      email: "m@example.com",
      avatar: "/avatars/shadcn.jpg",
    },
    navMain: [
      {
        title: "Dashboard",
        url: "/dashboard",
        icon: IconDashboard,
      },
      {
        title: "Check Balance",
        url: "/CheckBalance",
        icon: IconChartBar,
      },
    ],
  };

  return (
    <Sidebar>
      <SidebarHeader>
        <SidebarMenu>
          <SidebarMenuItem>
            <SidebarMenuButton
              asChild
              className="data-[slot=sidebar-menu-button]:p-1.5!"
            >
              <a href="#">
                <span className="text-base font-semibold">Payments</span>
              </a>
            </SidebarMenuButton>
          </SidebarMenuItem>
        </SidebarMenu>
      </SidebarHeader>
      <SidebarContent>
        <NavMain items={data.navMain} />
      </SidebarContent>
      <SidebarFooter>
        <NavUser user={data.user} />
      </SidebarFooter>
    </Sidebar>
  );
}
The navigation data is centralized in a simple configuration object:
  navMain: [
    {
      title: "Dashboard",
      url: "/Dashboard",
      icon: IconDashboard,
    },
    {
      title: "Check Balance",
      url: "/CheckBalance",
      icon: IconChartBar,
    },
  ],
};
This makes it easy to add additional pages later.
For example:
{
  title: "Transfer Money",
  url: "/TransferMoney",
  icon: IconTransfer,
}
without modifying the sidebar implementation.
The AppSidebar component acts as the main navigation container for all authenticated pages.
To keep things maintainable, I separated the sidebar into three distinct sections:
SidebarHeader → Displays application branding.
SidebarContent → Contains the main navigation links.
SidebarFooter → Displays the logged-in user's information and actions.
This structure makes the sidebar easier to extend as the application grows.
The navigation links themselves are not rendered directly inside AppSidebar. Instead, they are passed to a dedicated NavMain component.
<SidebarContent>
  <NavMain items={data.navMain} />
</SidebarContent>
This keeps the sidebar focused on layout while allowing navigation logic to live in a reusable component.
Creating Reusable Navigation
To render navigation links, I created a NavMain component.
src/components/nav-main.tsx
import type { Icon } from "@tabler/icons-react";
import { Link } from "@tanstack/react-router";

import {
  SidebarGroup,
  SidebarGroupContent,
  SidebarMenu,
  SidebarMenuButton,
  SidebarMenuItem,
} from "@/components/ui/sidebar";

export function NavMain({
  items,
}: {
  items: {
    title: string;
    url: string;
    icon?: Icon;
  }[];
}) {
  return (
    <SidebarGroup>
      <SidebarGroupContent>
        <SidebarMenu>
          {items.map((item) => (
            <SidebarMenuItem key={item.title}>
              <SidebarMenuButton asChild>
                <Link to={item.url}>
                  {item.icon && <item.icon />}
                  <span>{item.title}</span>
                </Link>
              </SidebarMenuButton>
            </SidebarMenuItem>
          ))}
        </SidebarMenu>
      </SidebarGroupContent>
    </SidebarGroup>
  );
}
Adding a User Dropdown
Most dashboard applications provide quick access to profile-related actions directly from the sidebar.
To implement this, I installed additional Shadcn UI components:
bunx --bun shadcn@latest add dropdown-menu
bunx --bun shadcn@latest add avatar
I also installed Tabler Icons for consistent iconography throughout the application:
bun add @tabler/icons-react
Next, I created a dedicated NavUser component that displays:
src/components/nav-user.tsx
import {
  SidebarMenu,
  SidebarMenuButton,
  SidebarMenuItem,
  useSidebar,
} from "./ui/sidebar";

import { Avatar, AvatarFallback, AvatarImage } from "@/components/ui/avatar";

import {
  DropdownMenu,
  DropdownMenuContent,
  DropdownMenuGroup,
  DropdownMenuItem,
  DropdownMenuLabel,
  DropdownMenuSeparator,
  DropdownMenuTrigger,
} from "@/components/ui/dropdown-menu";
import {
  IconDotsVertical,
  IconLogout,
  IconUserCircle,
} from "@tabler/icons-react";

export function NavUser({
  user,
}: {
  user: {
    name: string;
    email: string;
    avatar: string;
  };
}) {
  const { isMobile } = useSidebar();

  return (
    <SidebarMenu>
      <SidebarMenuItem>
        <DropdownMenu>
          <DropdownMenuTrigger asChild>
            <SidebarMenuButton
              size="lg"
              className="data-[state=open]:bg-sidebar-accent data-[state=open]:text-sidebar-accent-foreground"
            >
              <Avatar className="h-8 w-8 rounded-lg grayscale">
                <AvatarImage src={user.avatar} alt={user.name} />
                <AvatarFallback className="rounded-lg">CN</AvatarFallback>
              </Avatar>
              <div className="grid flex-1 text-left text-sm leading-tight">
                <span className="truncate font-medium">{user.name}</span>
                <span className="truncate text-xs text-muted-foreground">
                  {user.email}
                </span>
              </div>
              <IconDotsVertical className="ml-auto size-4" />
            </SidebarMenuButton>
          </DropdownMenuTrigger>
          <DropdownMenuContent
            className="w-(--radix-dropdown-menu-trigger-width) min-w-56 rounded-lg"
            side={isMobile ? "bottom" : "right"}
            align="end"
            sideOffset={4}
          >
            <DropdownMenuLabel className="p-0 font-normal">
              <div className="flex items-center gap-2 px-1 py-1.5 text-left text-sm">
                <Avatar className="h-8 w-8 rounded-lg">
                  <AvatarImage src={user.avatar} alt={user.name} />
                  <AvatarFallback className="rounded-lg">CN</AvatarFallback>
                </Avatar>
                <div className="grid flex-1 text-left text-sm leading-tight">
                  <span className="truncate font-medium">{user.name}</span>
                  <span className="truncate text-xs text-muted-foreground">
                    {user.email}
                  </span>
                </div>
              </div>
            </DropdownMenuLabel>
            <DropdownMenuSeparator />
            <DropdownMenuGroup>
              <DropdownMenuItem>
                <IconUserCircle />
                Profile
              </DropdownMenuItem>
            </DropdownMenuGroup>
            <DropdownMenuSeparator />
            <DropdownMenuItem>
              <IconLogout />
              Log out
            </DropdownMenuItem>
          </DropdownMenuContent>
        </DropdownMenu>
      </SidebarMenuItem>
    </SidebarMenu>
  );
}
This component is rendered inside the sidebar footer:
<SidebarFooter>
  <NavUser user={data.user} />
</SidebarFooter>
Separating user-related functionality into its own component keeps the sidebar clean and makes future enhancements—such as connecting it to real authentication data—much easier.
The final result is a dashboard layout where navigation lives on the left, user actions are grouped at the bottom, and TanStack Router renders the selected page inside the shared layout through the Outlet.
Final Route Structure
After implementing the sidebar layout, the application structure became:
routes
│
├── __root.tsx
│
├── index.tsx
├── signup.tsx
│
├── _authenticated.tsx
│
└── _authenticated
    ├── Dashboard.tsx
    └── CheckBalance.tsx
Navigation flow:
      Login
        ↓
Dashboard Layout
        ↓
 ┌──────────
 │  Sidebar      │
 │               │
 │ Dashboard     │
 │ Check Balance │
 └──────────
         ↓
      Outlet
         ↓
   Selected Page

Step8: Building the Members Dashboard
With authentication in place, the next step was creating a dashboard where users can view and interact with other members of the platform.
Fetching All Users
On the backend, I created a protected GET /getAllUsers endpoint that returns all users except the currently logged-in user. This endpoint is protected by authMiddleware, ensuring that only authenticated users can access the data.
On the frontend, I created a helper function to fetch users from the API:
export const getAllUsers = async () => {
  const response = await api.get("/v1/user/getAllUsers");

  return response.data.data.users;
};
Creating the Members Table
I used Shadcn UI components to create a clean dashboard table.
src/components/members-table.tsx
import { Button } from "@/components/ui/button";
import {
  Card,
  CardContent,
  CardHeader,
  CardTitle,
  CardDescription,
} from "@/components/ui/card";
import { Avatar, AvatarFallback } from "@/components/ui/avatar";
import { CreditCard } from "lucide-react";
import { useQuery } from "@tanstack/react-query";
import { getAllUsers } from "@/features/auth/api/auth.api";
import { Spinner } from "./ui/spinner";
import { useState } from "react";
import { SendMoneyDialog } from "@/components/send-money-dialog";

export function MembersTable() {
  const [selectedUser, setSelectedUser] = useState<{
    _id: string;
    firstName: string;
    lastName: string;
    email: string;
  } | null>(null);

  const [isDialogOpen, setIsDialogOpen] = useState(false);
  const { data: users = [], isLoading } = useQuery({
    queryKey: ["users"],
    queryFn: getAllUsers,
  });

  if (isLoading) {
    return (
      <div className="flex items-center justify-center min-h-screen">
        <Spinner />
      </div>
    );
  }

  return (
    <>
      <Card className="flex h-full flex-col">
        <CardHeader>
          <CardTitle>Members</CardTitle>
          <CardDescription>{users.length} people</CardDescription>
        </CardHeader>

        <CardContent className="flex-1 overflow-auto p-0">
          <div className="w-full">
            <table className="w-full">
              <thead className="border-b text-muted-foreground">
                <tr>
                  <th className="px-6 py-3 text-left text-sm font-medium">
                    Name
                  </th>
                  <th className="px-6 py-3 text-left text-sm font-medium">
                    Email
                  </th>
                  <th className="px-6 py-3 text-right text-sm font-medium">
                    Action
                  </th>
                </tr>
              </thead>

              <tbody>
                {users.map(
                  (user: {
                    _id: string;
                    firstName: string;
                    lastName: string;
                    email: string;
                  }) => (
                    <tr
                      key={user._id}
                      className="border-b transition-colors hover:bg-muted/50"
                    >
                      <td className="px-6 py-4">
                        <div className="flex items-center gap-3">
                          <Avatar className="h-9 w-9">
                            <AvatarFallback>
                              {`\({user.firstName[0]}\){user.lastName[0]}`}
                            </AvatarFallback>
                          </Avatar>

                          <span className="font-medium">
                            {user.firstName} {user.lastName}
                          </span>
                        </div>
                      </td>

                      <td className="px-6 py-4 text-muted-foreground">
                        {user.email}
                      </td>

                      <td className="px-6 py-4 text-right">
                        <Button
                          variant="outline"
                          size="sm"
                          onClick={() => {
                            setSelectedUser(user);
                            setIsDialogOpen(true);
                          }}
                        >
                          <CreditCard className="mr-2 h-4 w-4" />
                          Pay
                        </Button>
                      </td>
                    </tr>
                  ),
                )}
              </tbody>
            </table>
          </div>
        </CardContent>
      </Card>
      <SendMoneyDialog
        open={isDialogOpen}
        onOpenChange={setIsDialogOpen}
        user={selectedUser}
      />
    </>
  );
}
Fetching All Members with TanStack Query
To manage server state efficiently, I used TanStack Query's useQuery hook.
const { data: users = [], isLoading } = useQuery({
  queryKey: ["users"],
  queryFn: getAllUsers,
});
Finally, I updated the Dashboard route to render the MembersTable component.
routes/_authenticated/Dashboard.tsx
import { MembersTable } from "@/components/members-table";
import { createFileRoute } from "@tanstack/react-router";

export const Route = createFileRoute("/_authenticated/Dashboard")({
  component: DashboardPage,
});

function DashboardPage() {
  return (
    <div className="h-[calc(100vh-5rem)] p-6">
      <MembersTable />
    </div>
  );
}
Result
At this point, users can:
View all members except themselves
Open a payment dialog for any member
Prepare for money transfers directly from the dashboard

Step 9: Implementing Money Transfer Functionality
Now that users can view all members from the dashboard, the next step is allowing them to transfer money to another user.
To keep the dashboard clean and reusable, I created a separate SendMoneyDialog component that opens whenever the user clicks the Pay button.
Creating the Transfer Dialog
The dialog displays the selected user's information and provides an input field where the sender can enter the amount they want to transfer.
src/components/send-money-dialog.tsx
import {
  Dialog,
  DialogContent,
  DialogHeader,
  DialogTitle,
} from "@/components/ui/dialog";
import { Avatar, AvatarFallback } from "@/components/ui/avatar";
import { Button } from "@/components/ui/button";
import { Input } from "@/components/ui/input";
import { Send } from "lucide-react";
import { useState } from "react";
import { useTransferMoney } from "@/features/transferMoney/hooks/useTransferMoney";

type User = {
  _id: string;
  firstName: string;
  lastName: string;
  email: string;
};

type Props = {
  open: boolean;
  onOpenChange: (open: boolean) => void;
  user: User | null;
};

export function SendMoneyDialog({ open, onOpenChange, user }: Props) {
  const [amount, setAmount] = useState("");

  const transferMutation = useTransferMoney();

  if (!user) return null;

  const handleSendMoney = async () => {
    await transferMutation.mutateAsync({
      to: user._id,
      amount: Number(amount),
    });

    onOpenChange(false);
    setAmount("");
  };

  return (
    <Dialog open={open} onOpenChange={onOpenChange}>
      <DialogContent className="sm:max-w-md">
        <DialogHeader>
          <DialogTitle>Send payment</DialogTitle>
        </DialogHeader>

        {/* User details and amount input */}
      </DialogContent>
    </Dialog>
  );
}
Creating the Transfer API
Next, I created an API helper that sends the transfer request to the backend.
src/features/transferMoney/api/account.api.ts
import api from "@/api/axios";

export const transferMoney = (data: {
  to: string;
  amount: number;
}) => {
  return api.post("/v1/account/transfer", data);
};
Creating a Custom Mutation Hook
Since transferring money modifies server-side data, I used TanStack Query's useMutation hook.
src/features/transferMoney/hooks/useTransferMoney.ts
import { useMutation } from "@tanstack/react-query";
import { transferMoney } from "../api/account.api";

export const useTransferMoney = () => {
  return useMutation({
    mutationFn: transferMoney,
  });
};
Triggering the Transfer
When the user clicks the Send Payment button, the dialog calls the mutation and sends the recipient ID and amount to the backend.
const handleSendMoney = async () => {
  await transferMutation.mutateAsync({
    to: user._id,
    amount: Number(amount),
  });

  onOpenChange(false);
  setAmount("");
};
Result
At this stage, users can:
Open a payment dialog directly from the dashboard
Enter an amount to transfer
Send money to another user
Trigger a backend transaction securely

In the next step, we'll implement balance checking and display the user's current wallet balance inside the application.
Step 10: Implementing Balance Checking
After implementing money transfers, I wanted users to be able to check their current wallet balance.
To achieve this, I created a dedicated Check Balance page that fetches and displays the logged-in user's account balance.
Creating the Balance API
First, I created a helper function to fetch the user's balance from the backend.
export const checkBalance = async () => {
  const response = await api.get("/v1/account/checkBalance");

  return response.data.data;
};
Creating the Check Balance Route
Next, I created a separate route for checking account balance.
routes/_authenticated/CheckBalance.tsx
import { createFileRoute } from "@tanstack/react-router";
import CheckBalance from "@/components/check-balance";

export const Route = createFileRoute("/_authenticated/CheckBalance")({
  component: CheckBalancePage,
});

function CheckBalancePage() {
  return <CheckBalance />;
}
Building the Check Balance Component
I created a reusable CheckBalance component that displays the logged-in user's information along with a hidden balance section.
src/components/check-balance.tsx
"use client";

import { useState } from "react";
import { Card, CardContent, CardHeader } from "@/components/ui/card";
import { Button } from "@/components/ui/button";
import { Separator } from "@/components/ui/separator";
import { Avatar, AvatarFallback } from "@/components/ui/avatar";
import { Eye, EyeOff, Loader2, Lock, Clock } from "lucide-react";
import { useRouter } from "@tanstack/react-router";
import { useQuery } from "@tanstack/react-query";
import { checkBalance } from "@/features/transferMoney/api/account.api";

type User = {
  firstName: string;
  lastName: string;
};

export default function CheckBalance() {
  const router = useRouter();
  const user: User | null = router?.options?.context?.auth?.user ?? null;
  const [visible, setVisible] = useState(false);

  const { data, isFetching, refetch } = useQuery({
    queryKey: ["balance"],
    queryFn: checkBalance,
    enabled: false, // don't fetch on mount
  });

  const handleReveal = async () => {
    await refetch();
    setVisible(true);
  };

  const handleHide = () => {
    setVisible(false);
  };

  return (
    <div className="min-h-screen bg-muted/40 flex items-center justify-center p-4">
      <Card className="w-full max-w-sm shadow-sm">
        <CardHeader className="flex flex-col items-center text-center pb-0 pt-6">
          <Avatar className="mb-3 h-14 w-14">
            <AvatarFallback className="bg-blue-50 text-base font-medium text-blue-800">
              {`\({user?.firstName?.charAt(0)}\){user?.lastName?.charAt(0)}`}
            </AvatarFallback>
          </Avatar>

          <p className="text-sm font-medium text-foreground">{`\({user?.firstName} \){user?.lastName}`}</p>
        </CardHeader>

        <CardContent className="pt-6">
          <Separator className="mb-6" />

          <p className="text-[11px] uppercase tracking-widest text-muted-foreground text-center mb-3">
            Account balance
          </p>

          {/* Hidden state */}
          {!visible && (
            <div className="text-center">
              <div className="flex items-center justify-center gap-1.5 mb-2 h-12">
                {Array.from({ length: 8 }).map((_, i) => (
                  <span
                    key={i}
                    className="w-2 h-2 rounded-full bg-muted-foreground/30"
                  />
                ))}
              </div>
              <div className="flex items-center justify-center gap-1.5 text-xs text-muted-foreground mb-6">
                <Lock className="h-3 w-3" />
                Balance hidden
              </div>
              <Button
                className="w-full"
                onClick={handleReveal}
                disabled={isFetching}
              >
                {isFetching ? (
                  <>
                    <Loader2 className="h-4 w-4 animate-spin" />
                    Checking...
                  </>
                ) : (
                  <>
                    <Eye className="h-4 w-4" />
                    Check balance
                  </>
                )}
              </Button>
            </div>
          )}

          {/* Revealed state */}
          {visible && (
            <div className="text-center animate-in fade-in slide-in-from-bottom-1 duration-300">
              <div className="text-4xl font-medium tracking-tight text-foreground mb-1">
                ₹ {data?.balance?.toLocaleString()}
              </div>
              <div className="flex items-center justify-center gap-1.5 text-xs text-muted-foreground mb-6">
                <Clock className="h-3 w-3" />
                Updated just now
              </div>
              <Button variant="outline" className="w-full" onClick={handleHide}>
                <EyeOff className="h-4 w-4" />
                Hide balance
              </Button>
            </div>
          )}
        </CardContent>
      </Card>
    </div>
  );
}
Since checking balance is a read operation, I used TanStack Query's useQuery hook.
However, I didn't want the request to run immediately when the page loads, so I disabled automatic fetching using enabled: false.
const { data, isFetching, refetch } = useQuery({
  queryKey: ["balance"],
  queryFn: checkBalance,
  enabled: false,
});
This allows the query to run only when explicitly triggered.
Triggering the Request
When the user clicks the Check Balance button, I manually trigger the query using refetch() and reveal the balance card.
const handleReveal = async () => {
  await refetch();
  setVisible(true);
};
Result
At this point, users can:
Check their current wallet balance
Fetch balance only when requested
Hide and reveal balance whenever needed

Final Thoughts
In this tutorial, we built a complete Paytm-style wallet application using modern React and Node.js technologies.
Starting from project setup, we implemented:
User registration and login
JWT-based authentication
Protected routes with TanStack Router
Authentication state management with TanStack Query
Dashboard with all registered members
Money transfer functionality
Real-time balance checking
Reusable UI components with Shadcn UI
Backend APIs using Express and MongoDB
Source Code
The complete source code for this project is available on GitHub:
https://github.com/shubhamsinghbundela/payment-frontend-react-ts
Feel free to explore the code, fork the repository, and build upon it for your own learning.
Thanks for reading. I hope this tutorial helped you understand how to build a full-stack payment application using React, TypeScript, TanStack Router, TanStack Query, Express, MongoDB, and Shadcn UI.
Happy coding! 🎉